 |
 Join Date: Feb 2008
06-20-2010, 7:03 PM
Join Date: Feb 2008
06-20-2010, 7:03 PM
|
Reply
|
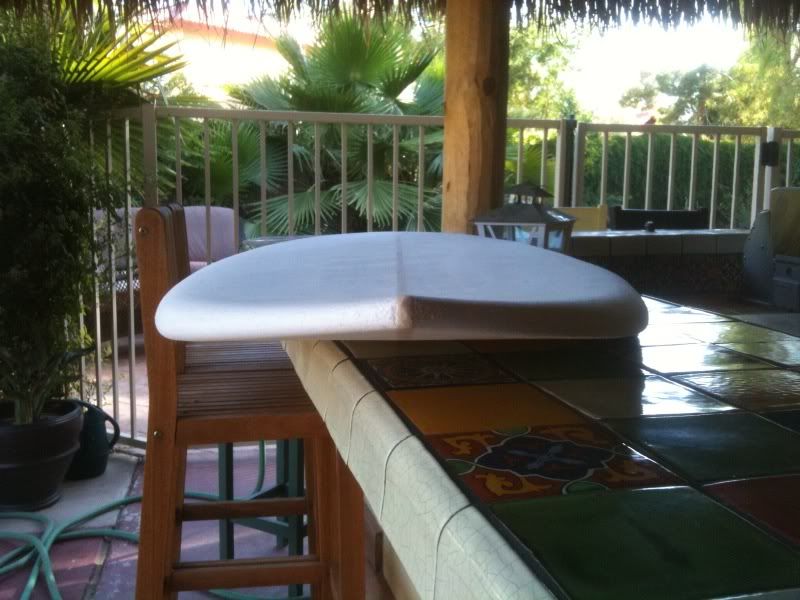
First and foremost, I must say that Surfdad (Jeff Walker) is an invaluable resource, so thank you Jeff for answering my "first timer" questions. There is a ton of information that can be found on Wakeworld about board building posted by several home shapers, so I thought it only fitting that I post my little bit of information for the next guy in line willing to take on the challenge.
This was my first ever surboard build, and first time working with fiberglass cloth and epoxy. I must say, this was a great experience and I can't wait to start building my next board.
The board details are: - 2lbs EPS Foam
- 4'10" Length
- 21" Width
- 2" Thickness
- Futures Thruster fins with trailer
- Resin Research 2000 Epoxy
- Single 6oz bottom lamination
- Double 6oz Top Lamination
- Triple X surf traction
I started with a block of foam. I found a local company (prowall.com) that was willing to supply me with the 2lb EPS foam, although I had to order a minimum length of 2'x10'x4'". No big deal, this gives me enough foam for 2 boards. Anyone looking to build a board should check them out. They actually cut surfboard blanks out of their California plant.
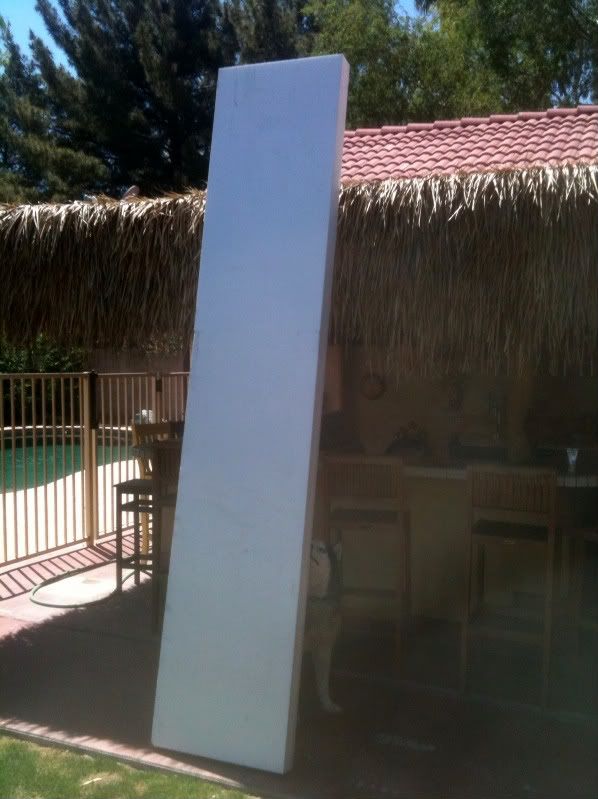
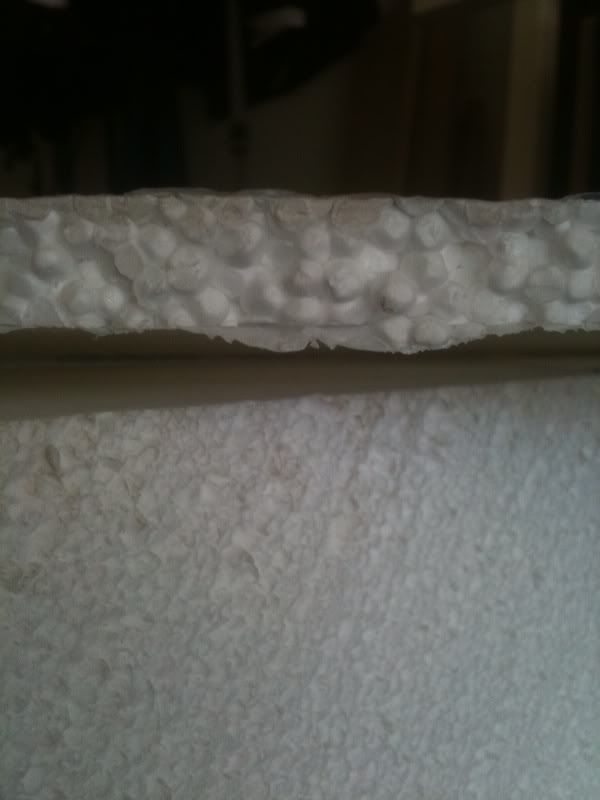
And here's a picture showing the difference in density between this 2lb EPS foam and the foam you can buy at Home Depot
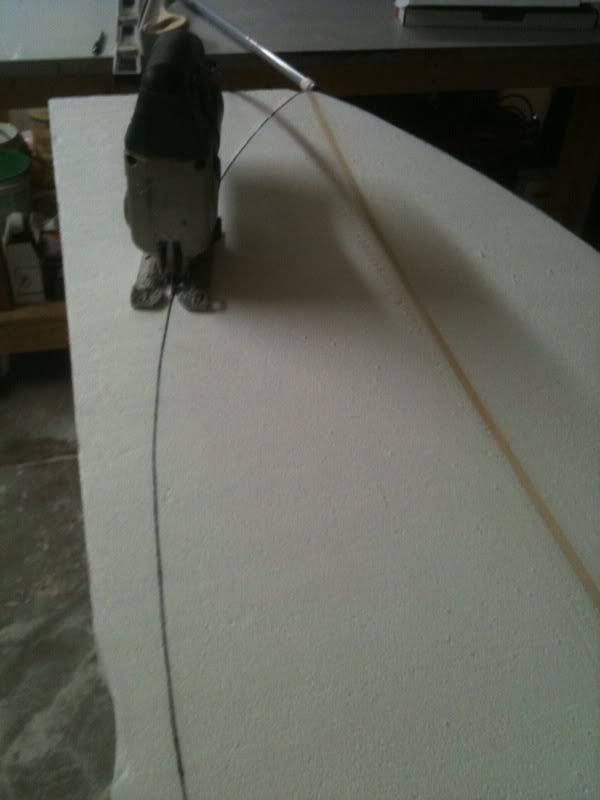
Next step was to cut the foam in half and install the stringer. I used Basswood. My cut wasn't very good, so I flipped the halves around and used the nice clean cut from the supplier to glue in the stringer material. (hindsight - I should've used the stinkin panel saw sitting in my garage instead of a hand saw to cut the blank in half  )
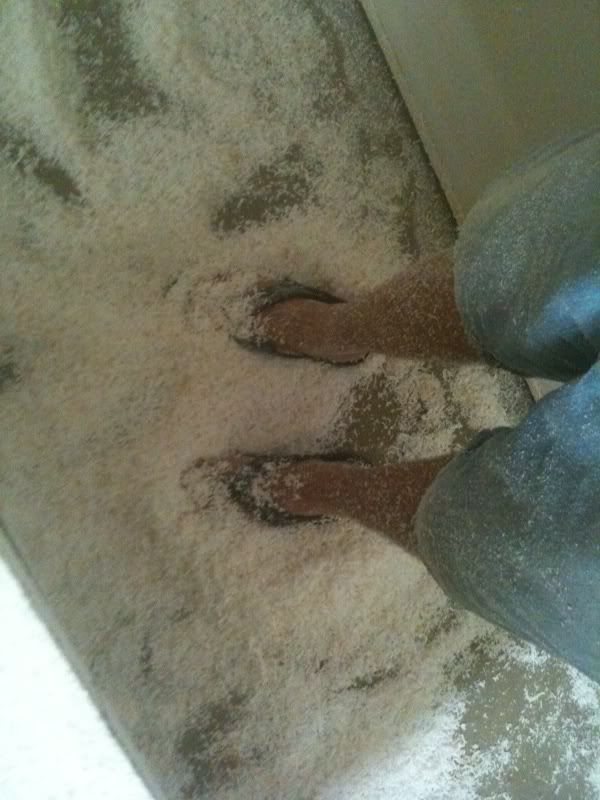
I started out telling myself I was going to shape the board completely with hand tools, and formed the top shape strictly with a surfoam and sanding block. Wow, what a bunch of work. Needless to say, when it came to forming the bottom rocker I grabbed the power plane to get it close before breakin out the surfoam and sanding block to clean it up.

More to come....
|
|
Join Date: Feb 2008
06-20-2010, 7:15 PM
|
Reply
|
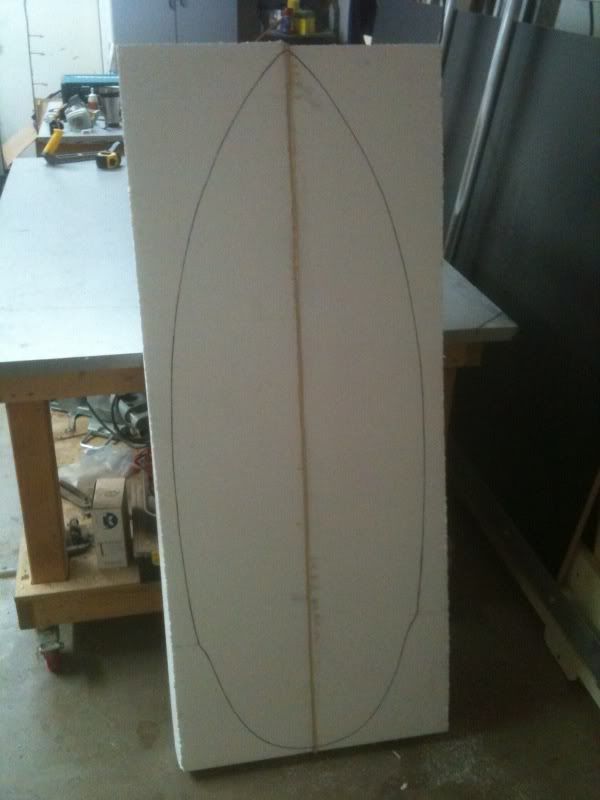
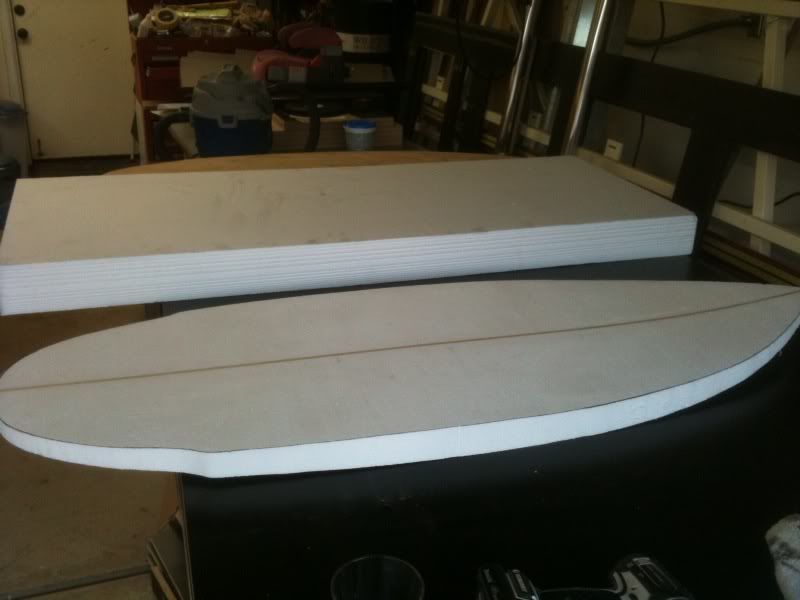
From there, I finished the general deck and rocker shaping and cut the outline of the board.
Here's a picture of the board cutout laying next to the extra piece of foam I'll be using for my next build.
When it came to shaping the rails, I'll admit, I sort of made it up as I went along. I referenced some rail shapes at greenlight, as well as my other boards, to get a general idea of what I wanted from the rails. Again, 1st board build.......
Unfortunately, I didn't take any pictures of the final sanding/shaping and filler steps
|
|
Join Date: Feb 2008
06-20-2010, 7:27 PM
|
Reply
|
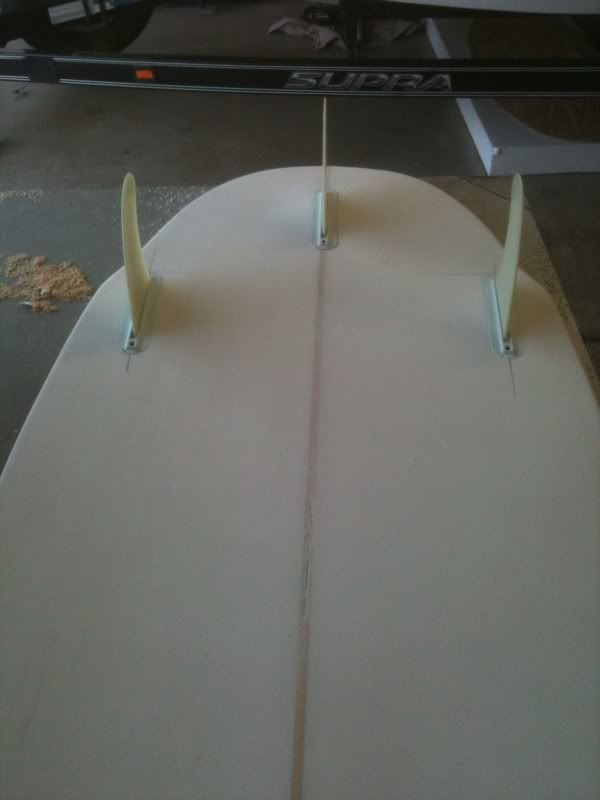
Once the board was filled and cleaned up, I cut the fin boxes using a homemade jig and my laminate trim router and bits.
Fin boxes dry fit in place.
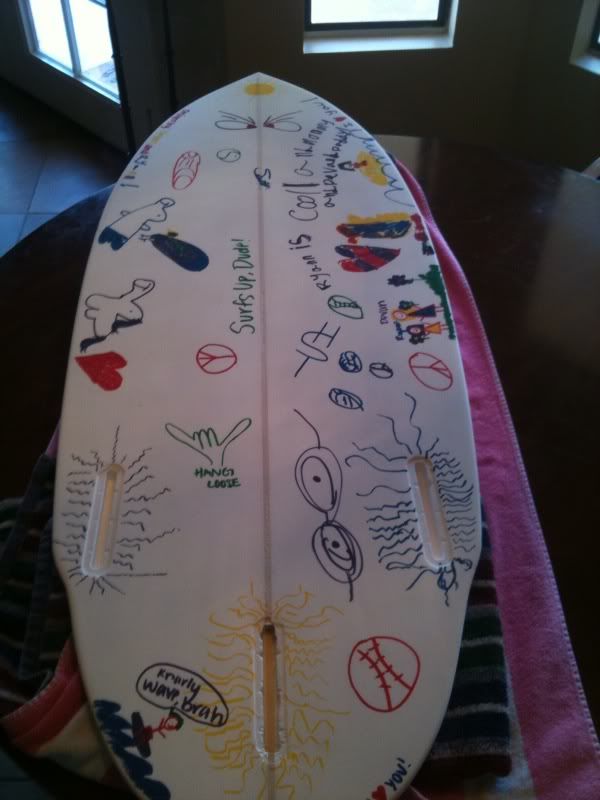
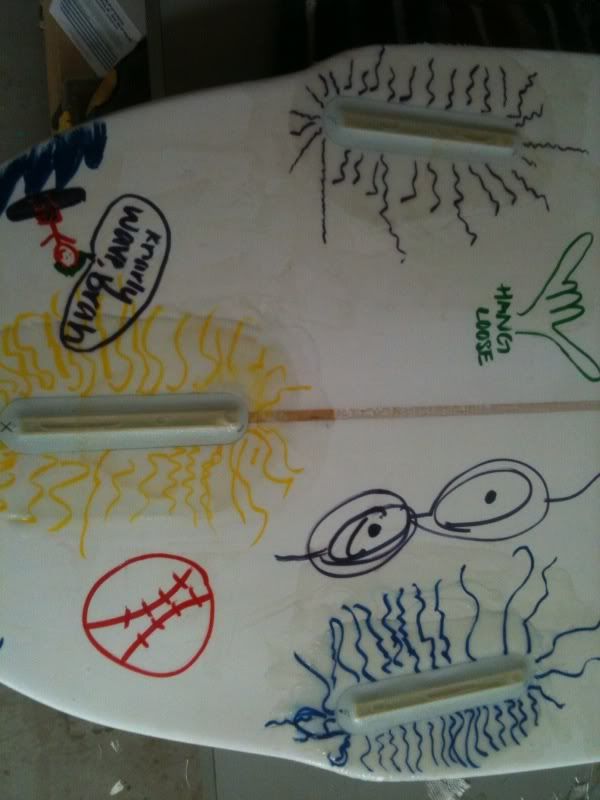
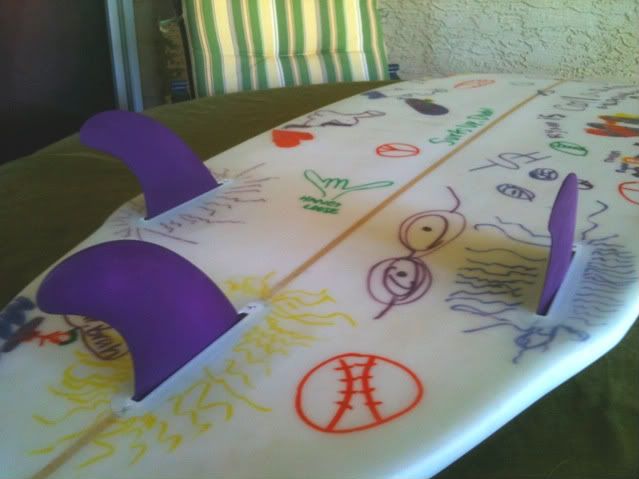
When it came time to paint, I decided to let my 2 daughters take care of the artwork for the board. I was happy to get them involved in the build, and it let them feel like they were contributing to a board they were going to surf.
Finboxes epoxied in place with cloth
Then it was time to start glassing the board. Right or wrong (who knows?), I laminated a single 6oz layer on the top deck, then the next day laminated a single 6oz layer on the bottom, and finally the following day, a second 6oz lamination on the top deck. Next time, I think I'll tackle the double 6oz lamination on the deck at once.

After ordering more epozy from Resin Research, I was ready for the hot/sanding coats
|
|
Join Date: Feb 2008
06-20-2010, 7:33 PM
|
Reply
|
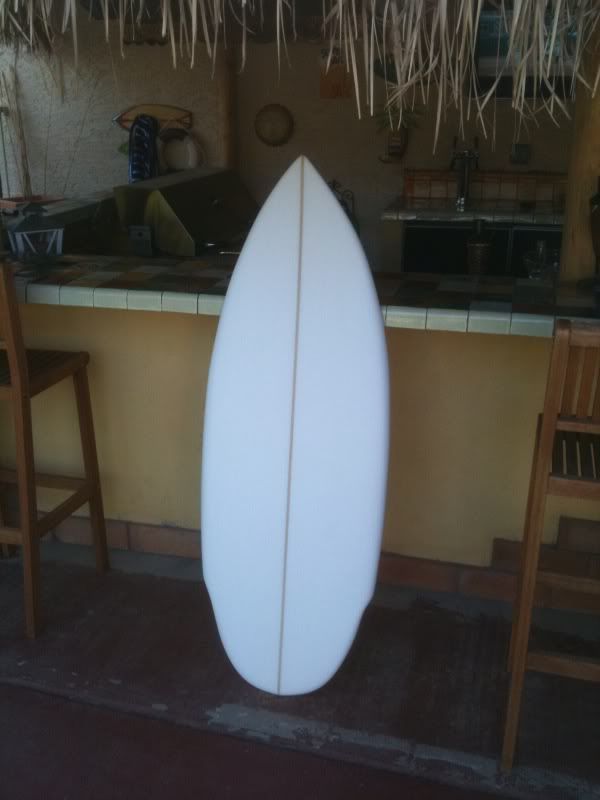
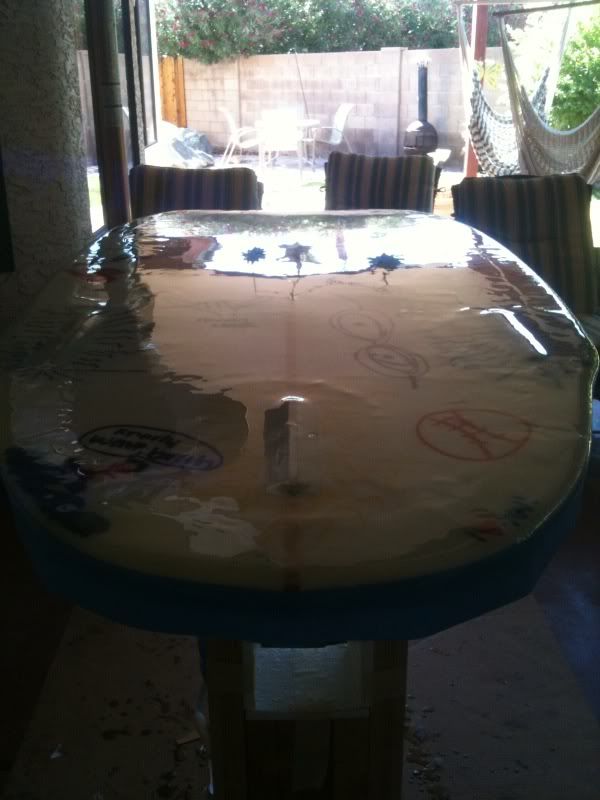
After the hot coats, I sanded the board smooth with 150 grit sandpaper, followed with 600 wetsanding. It gave the board a nice matte/sanded finish. You can see some imperfections in the board because the minor pits in the finish didn't get sanded out, so they are still glossy. But hey, it's my first build.....plus my kids say those spots are "sparkly"
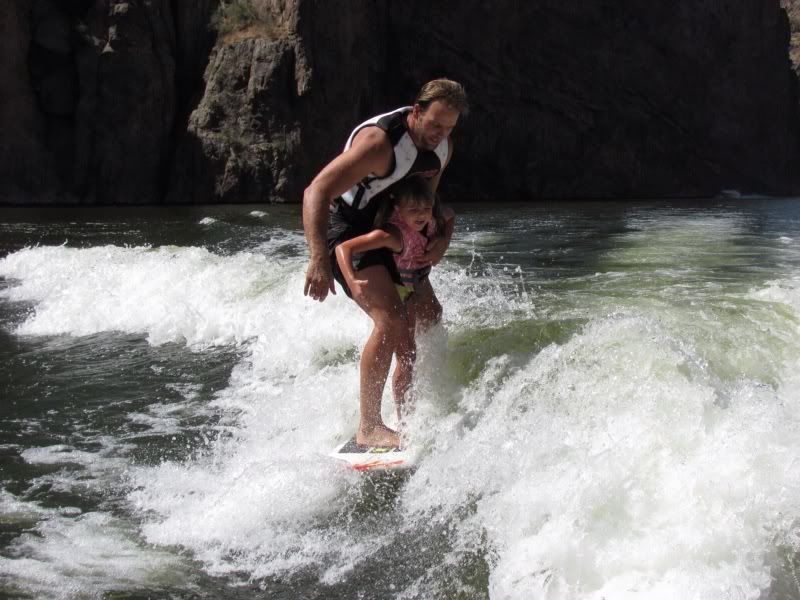
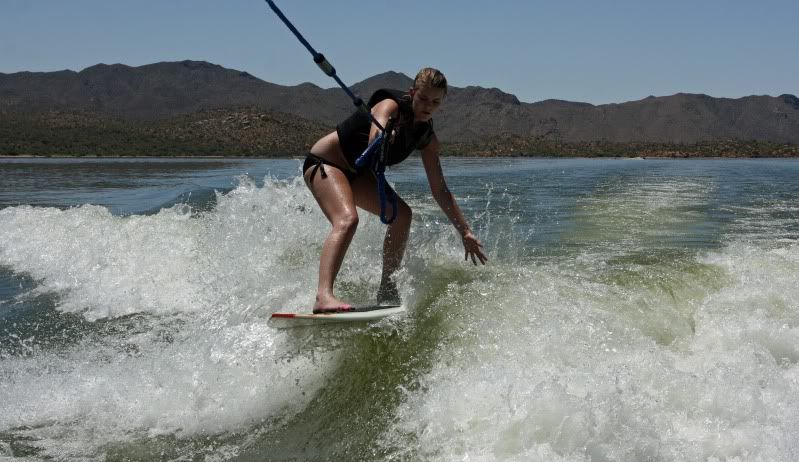
The absolute best part of the board build????
Ridin it, of course!!! (thanks go out to Shane for the ride pics )

|
|
06-20-2010, 7:59 PM
|
Reply
|
|
Sweet! There is NOTHING like that first ride on yoru own stick. Love the artwork! Great job and thanks for sharing.
|
|
Join Date: Jan 2010
06-20-2010, 8:47 PM
|
Reply
|
|
Scott, that is AWESOME dude! I'd love to tackle a job like that in the near future but my "honey-do" list is already too long. Maybe next year. I have an idea...you perfect the technique and next year, I'll bug the crap out of you for tips, LOL!
|
|
Join Date: Mar 2010
06-20-2010, 9:44 PM
|
Reply
|
|
Man I love it, great write up... Wish I had the time creativity, & motivation...
|
|
Join Date: Jul 2008
06-20-2010, 10:06 PM
|
Reply
|
|
Woohoo! I got to ride it, pretty eff'n cool I must say. I looked up prowall and was gonna call you to see if it was the same place but got side tracked. Do you have to have a contractors liscence or will they sell to the public?
|
|
Join Date: Feb 2008
06-21-2010, 7:15 AM
|
Reply
|
|
Thanks for the kudos!
I think the artwork turned out great. I'm going to carry a Sharpie in the boat and have everyone that rides the board autograph the top deck. I had to tell my 6yr old she gets to sign the board EVERY time she rides it with me to try and entice her to get out there more often this summer.
Scottie, sounds like a good plan to me. I started researching and debating about doing the build last summer, but just couldn't pull the trigger on it. It was middle to late in the season anyway, so the board probably would have never gotten finished. Now I'm ready for the next one.
Shane, throw up some pictures of you rockin' the board. Prowall.com, same place. Go to the contacts page and call the Casa Grande foam plant. The lady that answers the phone (Vicki?) is a super sweat lady and will get you hooked up. Once the piece of foam is cut, they'll deliver it to their Phoenix location where you pickup and pay for it. No contractors license needed, but if you run in to a snag for some reason, give me a shout and I'll give them mine.
|
|
Join Date: Aug 2007
06-21-2010, 7:45 AM
|
Reply
|
|
That is very cool. Nice job.
|
|
Join Date: Jul 2009
06-21-2010, 8:43 AM
|
Reply
|
|
that is awesome ..... congrats to finishing your project!!!
|
|
Join Date: Jul 2007
06-21-2010, 10:26 AM
|
Reply
|
|
Nice job! I myself have dreamed about tryin to make a board. On a scale of one to ten, how diffucult do you think this project was?
|
|
Join Date: Jul 2008
06-21-2010, 2:24 PM
|
Reply
|
Quote:
Originally Posted by scottnaz

Thanks for the kudos!
I think the artwork turned out great. I'm going to carry a Sharpie in the boat and have everyone that rides the board autograph the top deck. I had to tell my 6yr old she gets to sign the board EVERY time she rides it with me to try and entice her to get out there more often this summer.
Scottie, sounds like a good plan to me. I started researching and debating about doing the build last summer, but just couldn't pull the trigger on it. It was middle to late in the season anyway, so the board probably would have never gotten finished. Now I'm ready for the next one.
Shane, throw up some pictures of you rockin' the board. Prowall.com, same place. Go to the contacts page and call the Casa Grande foam plant. The lady that answers the phone (Vicki?) is a super sweat lady and will get you hooked up. Once the piece of foam is cut, they'll deliver it to their Phoenix location where you pickup and pay for it. No contractors license needed, but if you run in to a snag for some reason, give me a shout and I'll give them mine.
|
Here you go, Me rockin the "Graffitti board" lol
[http:// 
|
|
Join Date: Sep 2008
06-21-2010, 4:44 PM
|
Reply
|
|
Can you post a picture of your homemade jig? The only reason I haven't finished my balsa board is because of the fin box install kit is expensive.
|
|
Join Date: Sep 2009
06-21-2010, 5:41 PM
|
Reply
|
|
Thanks for posting this up... I have seen surfdad's numerous build threads and it never once crossed my mind to try and tackle one myself. I think now, seeing that this was a first for you and how well it turned out, I may give this a try over the winter and see how I can do at it. Making a mental note to pull up some of surfdad's build threads and get some more info.
Board turned out great, and love your idea for the artwork!
|
|
Join Date: Feb 2008
06-21-2010, 7:37 PM
|
Reply
|
In addition to reading all the surfdad builds I could find on Wakeworld, Swaylocks, and anywhere else Google pulled up, here's a few other links I found useful:
http://surfersteve.com/introduction.htm
http://www.wakeworld.com/forum/showthread.php?t=732293
http://www.greenlightsurfsupply.com
http://www.foamez.com/pdfs/Epoxy%20E...on%20Guide.pdf
http://www.youtube.com/watch?v=IpJ_FLZP8WU
Here are some pictures of the jig I made tor the future fin box installation. I have made a few acrylic aquariums, so I had scrap of that laying around, and basically made a box that my Porter Cable laminate trim router slides back and forth in. I used 2 different size router bits, and had to adjust the depth of the router. It is a really simple jig, and wasn't a big deal to adjust the router bit height.
What type of router are you using Duffy?


|
|
Join Date: Jul 2008
06-22-2010, 10:03 AM
|
Reply
|
|
I checked out foamez.com and prolly will get most my stuff from them. I dont want to have to cut and glue the halves together plus the rocker already being built into the blank is a plus lol. Maybe my ocean surfing experience will help out a bit on my adventure. Gonna start a tool list here in a few days.
|
|
Join Date: Sep 2008
06-22-2010, 10:27 AM
|
Reply
|
Wanna sell the jig? I have a ryobi trim router. I think it would work perfect in your jig.
|
|
Join Date: Feb 2008
06-22-2010, 12:10 PM
|
Reply
|
|
Sweet Shane!! Let me know if there is anything I can do to help.
Are you guys heading out on Thursday?
|
|
Join Date: Jul 2008
06-22-2010, 1:54 PM
|
Reply
|
|
I don't know yet but theirs a good chance lol. What about you? Do you get out much during the week? I know we've had this conversation lol but I can't remember. If you want to sac up your boat let me know I got some gas money lol! After surfing your wake I'm jealous I got to get my mits on some more bags.
|
|
Join Date: Feb 2008
06-23-2010, 8:51 AM
|
Reply
|
|
I'm trying to get a job buttoned up today so I can ride tomorrow, otherwise, I'll be listing on Friday for sure.
Next trip out I'd like to remove the trailer fin from this board and see how much it loosens up.
|
|
Join Date: Jul 2008
06-23-2010, 8:06 PM
|
Reply
|
|
Hey homie whats it lookin like for you tomorrow?
|
|
Join Date: Mar 2008
06-24-2010, 9:56 AM
|
Reply
|
|
Scott!! This is a super awesome thread thanks for sharing and for documenting your process! I'm sure it was a good amount of work but you sure made it look fun!! Congrats and LOVE the graphics!! Haha! Gnarly wave brah!!
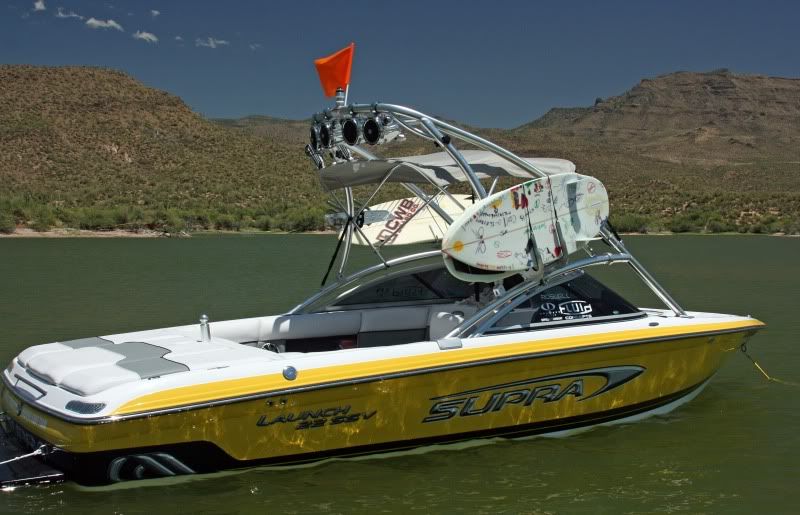
Hey how about a picture of that sweet boat you got there too? Heheheheheh!!!
|
|
Join Date: Feb 2008
06-26-2010, 11:45 AM
|
Reply
|
|
|
|
Join Date: Aug 2005
06-26-2010, 6:49 PM
|
Reply
|
Soooo Gooood!
|
|
Join Date: Feb 2008
06-29-2010, 6:13 PM
|
Reply
|
Quote:
Originally Posted by hawaj
Soooo Gooood! |
Thanks Petr. I got a lot of great information from reading your builds.
Thanks to Joey, and his write-up on how to dye fins ( http://www.wakeworld.com/forum/showthread.php?t=780328), I added a little more color to the board.......Purple!
|
|
Join Date: Jul 2007
06-29-2010, 6:29 PM
|
Reply
|
|
Looks killer scott. thanks for the credit up there!!
Im thinking about ditching my wakewinch project for a while and attempting to shape a board. You know ill be comin to you with some questions!
How long did you spend workin on that monster? And whered the inspiration for the shape com from?
|
|
Join Date: Feb 2008
06-30-2010, 8:06 AM
|
Reply
|
Do it Joey!! It was a great experience building the board. I'm happy to help in anyway I can, just give me a shout.
Inspiration for the board came from another one of my boards. I figured it would be quickest and easiest to loosely copy the shape of another board. Plus, let's face it, I would probably have to build 1000 boards before getting it "figured out" enough to compete with the ride and quality of these custom board makers.
All in all, it wasn't too time consuming, although, I dragged it out over several weeks. I'd say I spent: - Glue in stringer, Deck/Bottom Shaping, Shape Cutout = 6 hrs (It took me 2+ hours to rough shape the deck by hand, not recommended)
- Rail Shaping and Sanding of entire board = 2 hrs
- Filler and Final Sanding = 1 hr
- Fin box cut-out and painting = 1 hr
- 1st cloth/epoxy coat = 1.5 hrs
- 2nd cloth/epoxy coat = .75 hrs
- 3rd cloth/epoxy coat = .75 hrs
- Hot coat = .5 hrs
- Hot coat other side = .5 hrs
- Final Sanding = 1 hr
Total time of 15-16 hrs, give or take. For the most part, I only worked on the board an hour here or there after work and a little on weekends. It certainly added extra time to the build because I'd go out and do an hour of shaping, then have to clean up all the shavings so they wouldn't get tracked in the house, instead of just spending one longer block of time shaping the whole thing, and only having to clean up once. I also used a slower setting resin because it was my first time working with cloth/epoxy and was skeered of the faster set. Next board, I think I'll use the faster setting resin. Using the slow set also slowed down the process to the point that I could only do one coat per day.
|
|
Join Date: Jul 2007
06-30-2010, 9:33 AM
|
Reply
|
|
Really think I might tackle this. Ill do some reading up and see what I come up with. Cant have it half finished at the end of the summer tho, gotta finish all my projects before I head back for school. Cant leave something half done!
|
|
Join Date: Feb 2008
07-14-2010, 8:28 PM
|
Reply
|
|
I'll admit, I was skeptical that fins could make such a difference in how a board rides.
I removed the trailer fin from the board, and it really loosened up the board and gave it a more aggressive feel. Then, I decided to take the Scimitar fins out of my TWP board and install them on this handmade board...... again, a completely different feel. Looser and faster.
Moral of the story, don't skimp on the fins!!!
|
|


 Linear Mode

